Thursday, December 4, 2014

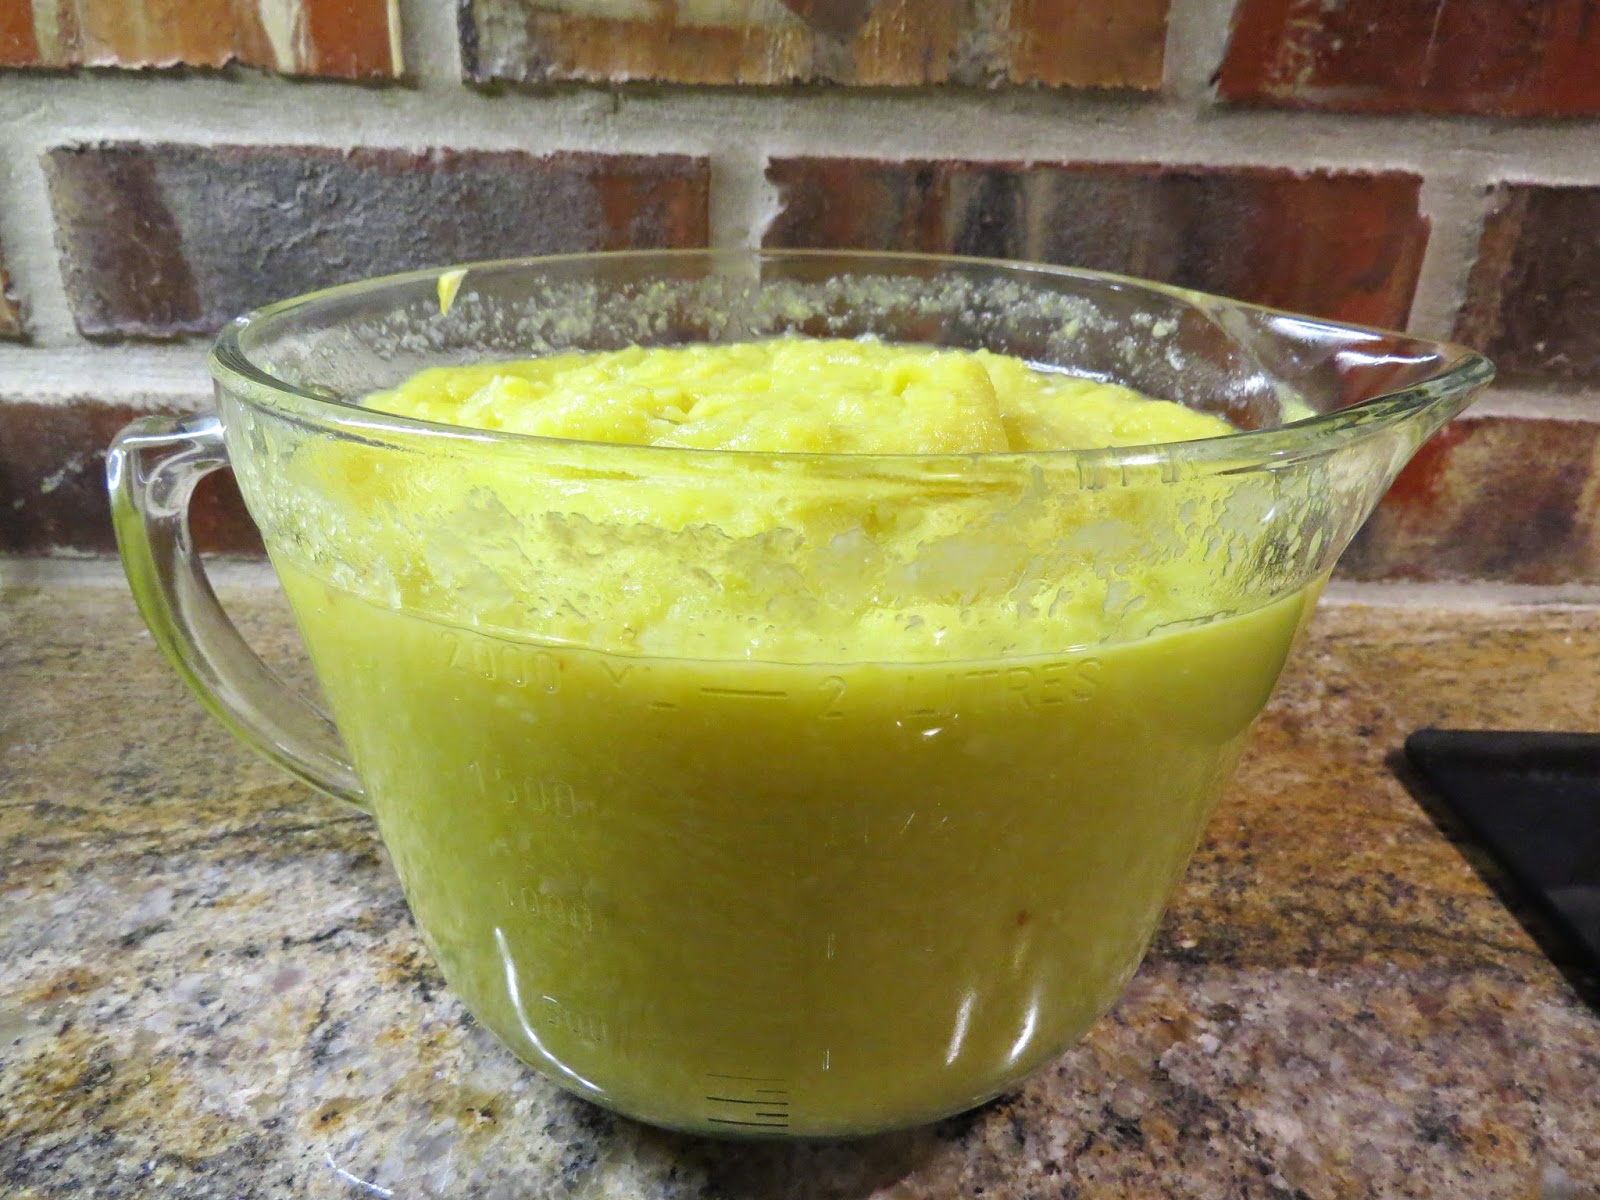
Deer Me!: Super Easy Deer Chili

Deer Bacon Tacos, Deer Bacon Meatloaf, Deer Bacon Pasta Bake, and...

Super Easy Deer Chili

This was my thrown-together-at-the-last-minute stab at Deer Bacon Chili based on the ingredients on hand, and everyone thought it turned out pretty swell:


2 1bs Deer Bacon Burger - our mix is only 10% bacon
1 can mild Rotel tomatoes, 10 oz, undrained
1 can petite diced tomatoes, 14.5 oz, undrained
1 can Ranch Style beans (original), 15 oz
1 bag chopped, frozen onion, 10 oz
1/3 cup finely processed old fashioned oatmeal*
3 Tbsp chili powder
1.5 tsps minced garlic
1/2 tsp sea salt
Fresh chopped tomato (optional
Hot sauce (optional)

Thaw meat. Brown and crumble meat on stove top.  Place meat and all** other ingredients in slow cooker. Stir. Cover with lid. Turn on low for 8 hours or high for 5 hours.

*I used our Baby Bullet to process the oatmeal to a fine powder.

**I did wait to put my oatmeal in at the last 30 minutes, once I realized a thickening agent was needed. During our gluten-free days, we found that it is not uncommon to find oats in canned chili at the grocery store.

How should you eat your Super Easy Deer Chili?  Plain, on rice, over a baked potato, over French fries, on a bed of mixed greens, in a bell pepper cut like a taco shell, top it with crackers, cheese, sour cream, lettuce, tomato, onion - go crazy!  And, most importantly, keep it fun!

My dad's deer decoy, Scarface, is spending some time at our house at the moment.
The kids were clearly excited by his visit.

Important Note: I am not a chef nor have I played on T.V.  I am a mom of a growing family with lots and lots and lots of deer bacon burger in my deep freeze.  Feel free to share your favorite recipes for deer (aka venison) with me below in the comments.


Friday, November 7, 2014

Deer Me!! (Deer Bacon Burger Meatloaf)

After my dad bagged his third deer of the season this morning, my mom and I started racking our brains for more recipes that can be made with deer bacon hamburger.  This afternoon's effort is meatloaf.

I've never made a meatloaf before, and this is my effort combining a few traditional recipes found on www.allrecipes.com.  I thought the result was pretty good, I would probably enjoy it more if I was even more of a deer meat fan.  My husband thought it was good too, but I will probably keep playing with the recipe until I love it as much as my mom's traditional recipe - if that's possible.

Here's my recipe you can play with:

2 pounds deer meat with bacon added in during processing
1 chopped onion or 1/2 a bag of frozen, chopped onion
1 Tbsp butter
1 cup plain bread crumbs
1.5 cups BBQ sauce (I had Sweet Baby Ray's Original on hand.)
2 eggs, whisked
1 tsp of minced garlic (jarred)
1/2 tsp chili powder
2 Tbsp brown sugar

Preheat oven to 350 degrees.  Saute chopped onion with butter.  I microwaved my onion and butter for four minutes, stirring at two minutes.  Mix meat, onion, bread crumbs, one cup barbecue sauce, eggs, garlic, and chili powder thoroughly. Press into two 9x5" greased loaf pans.  Bake 35 minutes. Mix remaining 1/2 cup barbecue sauce with brown sugar.  Spoon over each loaf.  Return pans to oven, and cook for another 10 minutes or until the meatloaves reach an internal temperature of 160 degrees.  Let stand for 10 minutes before serving.

Deer Bacon Burger Tacos are still my favorite.  See the recipe here: http://hallshomestead.blogspot.com/2014/05/deer-me-deer-bacon-burger-tacos.html


Pinterest Fail: Green Bean Teepee

If you clicked here looking for how to make a green bean teepee successfully, click on, sister.  This is not what you are seeking....unless you want to learn from my mistakes.

First, I must confess, I'm not actually on Pinterest.  I know that if I join, my family and friends would rarely see me, and the random sightings would only be at craft stores and involve glue, stray bits of fabric, and dough covering my clothing.  I know my limitations, people.

I do, however, see what others share on Facebook, and I will occasionally tackle projects.  Such is the case with the much lauded "Green Bean Teepee."  Seriously, if you've been anywhere near Pinterest, Facebook, a Disney Family magazine, or a gardening publication in the past few years, you have probably seen the fantastic, legendary, GREEN BEAN TEEPEE.  So I tried it, and failed miserably.

Here's how to fail in a few easy steps:

  1. Do a soil test. Make sure your dirt is pitiful.  If your soil stinks, stuff won't grow, even weeds are reluctant.  I tried to make our teepee in the back yard, which is still fresh from the dirt work of house construction.  
  2. Get a couple of big dogs.  You really need some big dogs to mow down your teepee structure after you have worked so super duper hard to set it up just right for your kiddos to enjoy.  After they have knocked it down, be sure to set it up in a less satisfactory fashion.  Be sure to make sure it leans a little, like you were drinking heavily when you set it up.
  3. Repeat Step 2.  That's right, wait a a day or two with your fingers crossed, and then let your dogs run it over AGAIN.  This time they should hit it hard enough to snap the metal rod encased in the thick plastic gardening stake.  For a classy touch, pull out your best duct tape and "repair" the broken stake.
  4. Watch the green beans sprout up with excitement.  Watch their growth stop at about four inches, SO CLOSE to the first level of twine you are expecting the tendrils to clasp onto with vigor.  Watch the growth stop for a month or two before the sprouts disappear

Congratulations!  You now have a really tacky piece of yard art that only a few stray weeds will cling onto months later.  Take joy when people ask you "What's THAT???!!!" repeatedly.

And, there you have it, how to fail at a green bean teepee.


^^Pinterest Fail Documented^^

But, in all seriousness, we really will try this again. A green bean teepee does seem like a wonderful way to get kiddos outside even more and to add some sweet, magical memories to their childhood. And, it really does seem easy, in theory.

To increase the odds of success, I am adding a whole bunch of organic material to the back yard in an effort to improve the soil. Be sure to check back for a post on pine straw and chicken litter. (Are you at the edge of your seat in anticipation?)

And, fingers crossed, the dogs will be a year older this spring and a lot less rambunctious (hopefully).


Thursday, November 6, 2014

Pet Project: Katydid

Well, we have a new pet today - a katydid.


Turns out they are pretty easy to keep, unlike the toad we collected a couple of weeks ago, but I digress.

If you happen upon a katydid and want to keep it as a pet, check out this informative WikiHow article on katydids:  http://www.wikihow.com/Take-Care-of-a-Katydid-Insect  Here's how we followed the handy tips provided in that article.

We made the suggested habitat using an empty container that once held snacks from Costco.  We began with a layer of potting soil, topped it with some sandy soil out of the yard, stuck some recently propagated spearmint into the dirt, and added a stick, rocks, pine straw, etc. And, voila!!  We have a katydid habitat:
Be sure to mist your katydid daily and provide it with some Romaine lettuce, as mentioned in the link.
"He" has been named "Climber."  Never mind, that I think "he" is trying to lay eggs at the moment.

A picture of Climber trying to lay eggs.  On a related note, in my Googling, I found that Katydids/Bushcrickets have the largest testes in proportion to the their body size (up to 14% of  their body) of all insects.  <<Something to share at the water cooler.
An enjoyable and informative blog on katydids that you may like if you enjoyed this post: http://capeblogfromthebog.blogspot.com/2012/05/cacophony-of-katydids.html

And, on a side note, if you are looking for great information about that toad that your kids have brought into the house, check out this helpful site:
For a chuckle, be sure to read the answer to "My toad begins making cute little chirps when I pet him. I think this means he's singing because this feels good. What do you think, am I right?"

Thursday, September 25, 2014

Thinking of Homeschooling? Tips on Where to Start

If you are thinking about homeschooling, the first thing I would suggest is that you check out


I love this book,and I recommend it to everyone who has ever asked me about homeschooling.  I picked up the older version at Half Price Books in Dallas, and it was well worth every cent.  Not only did it tell me about different types of homeschooling (the options are vast!), but it also allowed me to take quizzes to see how my husband and I saw homeschooling happening every day and how my children learn best.  I then took that knowledge to the chart at the back of the book, which breaks down the major homeschool publishers into a handy a chart.  Instead of spending years and lots of $$$ trying out various methods, this book helped us to be successful from the beginning.

I used the information gleaned from this book to pick Sonlight's curriculum for our family.  This is our third year homeschooling (PK4, Kindergarten, 1st), and we have used Sonlight all three years.  This curriculum is perfect for us, because I love to read.  Books? Sonlight's got 'em. There is nothing better than cuddling down with my little ones and a good book.  We also hit our library for audiobooks to listen to in the car (Charlotte's Web, Little House in the Big Woods, Shrek, Princess and the Pea have all been playing lately), and we like to watch video adaptations of our favorites - Yay again for the library and for DVR!  Sorry to go on and on about our curriculum, but Sonlight is a great fit for our family, and Cathy Duffy's advice can help you get started in the right direction.

Another great way to find out if homeschooling is for you is to get out and visit with some homeschool moms and dads.  I always thought homeschoolers were weirdos as a kid.  I thought they must be part of a cult.  Once we moved to Dallas, I met some real, actual (not urban legend) homeschoolers.  Guess what? They were normal, socialized, and polite!  (Gasp!) I visited with the moms at length about where to start and what worked for them.  The moms varied in numbers of children and approach.  Ask them why they decided to homeschool. Ask them why they keep doing it.  Ask them what's tough about it.  Tell them your fears.  You are not alone.  They have been there and done that and may still be fearing that - us moms, we all have our doubts, confident homeschoolers included!

Visit a homeschool book fair. If you have a homeschool book fair in your area, check it out.  Put your hands on the books. Talk with the reps. Observe the wide variety of homeschoolers.  See all of the tools and resources available if you make this choice.

Most importantly, as you take these steps, pray about it.  Don't choose something for your family that isn't God's will - no matter how "right" it looks or how many "other people" are doing it. Your schooling option doesn't make you "better" or "worse" than anyone else.

Best wishes on your schooling adventures wherever they may take you!!


Thursday, September 18, 2014

Sunday, August 24, 2014

Mom's the Word: Glowing Reviews (Glow Stick Lanterns)

Mom's the Word: Glowing Reviews (Glow Stick Lanterns):   I recently bought a bunch of bracelet sized glow sticks for a party at our house, and, of course, I forgot to use them. Tonight, ins...

Thursday, August 14, 2014

Do You Know the Muffin Man? (Summer Squash Muffin Recipe)

I have a plethora of locally grown summer squash.  I did not grow it. I did not buy it.  I did not find it.  My mother-in-law offered it to me, and I simply cannot pass up such goodness.  I am the only one in our house of five who will eat it stewed, roasted, in squash dressing, grilled, etc. Sad, but true.

So, what to do?  Muffins.  Hide it in muffins.  "Why muffins?" you ask.  Well, muffins (and baked goods in general) are good vehicles to hide stuff.  And, we are about to begin the busy school year.  Travel to and from our homeschool co-op will require some dashing out the door with a travel ready breakfast.  Enter summer squash muffins.

I spent an inordinate amount of time researching the internet for muffin recipes, washing, and slicing about 18 cups of summer squash. And, there I was really wishing that I knew the muffin man, because I (in my post-kids-bedtime-wisdom) decided to turn it ALL into muffins.  You know, batch baking and freezing at its best, right???  And 9pm is a great time to attempt quadrupling a recipe you haven't tried before... At least the hubs turned Chopped on the television for me before he gave up and went to bed.

Of the limited recipes found on the internet, this recipe from Taste of Home was the winner, winner, chicken dinner:  http://www.tasteofhome.com/recipes/yellow-squash-muffins

After reading reviewer comments, I modified the recipe to the following:

Take approximately 1 lb yellow summer squash.  Wash it, top and tail it, and slice it into 1" pieces. No need to peel.  Fill a pot with 1" water, place the squash in, bring water to a boil, cover squash, reduce heat, simmer for 5 minutes or until tender. (Note: Definitely get it tender.  A few years ago, I made squash muffins using diced, raw summer squash.  It was... well, let's say it was "hearty.") Drain and mash, using an immersion (stick) blender. Take 2 cups of that squash to use for the below recipe.
Rendering the squash tender

The pureed product.  Remember to drain well before pureeing.
2 cups cooked summer squash, prepared as noted above
1/2 cup butter (1 stick), melted  **(See notes on subbing applesauce.)
1 egg, lightly beaten
1 1/2 cups all purpose flour
1/2 cup sugar
2 1/2 teaspoons baking powder
1/2 teaspoon salt
1/2 teaspoon cinnamon

Preheat oven to 375 degrees. Mix squash, melted butter, and egg.*  Place aside.  Mix dry ingredients - flour, sugar, baking powder, salt, cinnamon.  Add squash mixture to dry ingredients.  Mix until just moist. Grease or line muffin tins. Fill muffin cups until about 3/4 full.  Place in oven and bake for 20-25 minutes for regular muffin size, about 15 minutes for mini-muffin size. Cool for five minutes before removing to wire rack.
Yield: Approximately 1 dozen regular muffins or 2 dozen mini muffins.

Things are looking promising so far.
Cooling down

*Since I had enough cooked squash to make four batches, I was able to play with the recipe some.  The first time I made the recipe, I used the immersion blender to mix the wet ingredients.  That technique definitely gave a creaminess to the end result.  It made me think of a corn casserole without the hassle of a water bath.  (See info on what a water bath is here.)  If you don't use the immersion blender to mix the wet ingredients, they still taste great. You can mainly tell the difference by looking at the muffin tops. See the below pictures:

The mini souffles, I mean muffins, that resulted when the immersion
blender was used to blend the wet ingredients after pureeing the squash.
The more "rustic" texture of the muffins where the immersion blender
was not used to mix the wet ingredients, only to puree the squash.
**To increase the health quotient of these, you can substitute in no sugar added applesauce for 1/2 of the butter, 1/4 cup butter and 1/4 no sugar added applesauce.  I did this for the second two batches.  Please let me know your results if you substitute 100% of the butter with no sugar added applesauce. The applesauce does make the muffin a little less creamy, in my experience, but it pairs nicely with the cinnamon. You might even be able to pass these off as "Apple Cinnamon Muffins."

Another note: To grease muffin tins and cake pans, I haven't found anything better than Pam for Baking.  I tried Baker's Joy brand, but it smelled like glue to me.  Regular Pam doesn't cut it for detailed pans either; a lot is left stuck to the pan.

I think these summer squash muffins would be great disguised as cupcakes with some chocolate frosting on top, especially if you omit the cinnamon.  Another option would be keep the cinnamon and consider adding chopped walnuts, raisins, and some nutmeg.

What recipes do you use to transform your summer squash?  I'd enjoy hearing your experiences, good and otherwise.

Update:  The kids tried the muffins this morning not knowing the muffins are squash muffins.  Our five year old said "They are like cupcakes!"  Our three year old said "Thank you for making muffins, Momma!"

Monday, August 11, 2014

Hall Monitor (Solar Powered Drive Way Monitor)

When we first moved to the middle of nowhere, we did not expect many visitors.  Imagine our surprise in the first few days and weeks when our doorbell was being worn out, mostly by our sweet UPS delivery person, who, in all fairness, we should have expected.

Since we have no window treatments and children run around in all states of dress, we thought it would be good if we could find a way to know when someone was heading down our driveway.  Locking the gates daily didn't seem reasonable, and we weren't ready to shell out serious cash for electronic gates.  Enter the solar powered driveway monitor:


It arrived within two days of ordering, and we were able to install it immediately and effortlessly.  Is it a perfect solution?  No, but for the price and the functionality, we are sold.  19 times out of 20, we know when someone is arriving or leaving, which not only provides us a heads up but additional security.  If you live down a long driveway and would like to know when someone is heading your way, definitely consider this product.
This is what ours looks like installed.  Notice the ever so clever weed camouflage. 

From Ho Hum to Hummingbird Fun

Looking for some cheap, relaxing, and wholesome family fun? We recently put out a hummingbird feeder, and it has been tremendous fun to watch our little visitors buzz around, take a rest, and dive bomb one another.  Here are some pictures of this morning's visitors:

Resting, and warily watching for others

Fighting over the feeder
We love watching the little birds outside our living room window, and several of our recent weekend guests spent time in the recliner doing nothing other than watching the little acrobats.

So how can you bring this fun to your home?  Add a hummingbird feeder to your home.  Hummingbird feeders are readily available in the garden departments of stores during the summer, and the feeders are fairly inexpensive - basic models are about $10.  Ours was especially so, since we borrowed it from my parents who were not using it this year.  

Some hummingbird feeders are artwork in their own right. Below are some examples of the "beyond the basic" hummingbird feeders.


See more options even more options here:  Perry's hummingbird feeders

Things to Consider When Selecting a Hummingbird Feeder:
  1. How much nectar/sugar water will the feeder hold?  Some of the decorative feeders are downright beautiful in their own right, but their small reserves for nectar will require frequent refills.  The nectar/sugar water should be changed frequently, but consider your availability for refilling.
  2. Do you want perches for the hummingbirds to rest?  Some hummingbird feeders feature perches for the ever busy birds to rest while refueling.  The perches allow the little guys and gals to save some energy.  However, some prefer feeders without perches so pictures can be taken of the birds in flight. 
  3. Where will you place the feeder?  Plan to place the feeder where you can see these beautiful creatures in action. 3' or less from a window is advised. 6' or more from a window can be dangerous as it allows them to fly full speed into a window.  Suction cup options allow you to see the birds up close. Another option is an inexpensive garden hook from which to hang your feeder.  See garden hook examples here: garden hooks   
After you purchase your feeder, you will need to fill it.  Nectar mixes are available in stores and online (hummingbird nectar), or you can make your own sugar water for your winged friends.

Basic Sugar Water Recipe for Hummingbirds:
4 parts water to 1 part white sugar.  Red dye is not necessary, especially if you have a bright colored feeder.
Filtered water is preferred.  The kiddos like to help making the sugar water by taking turns stirring.

Go out and enjoy these little acrobats before they migrate this year!

UPDATE: I originally posted incorrect information about feeder placement.  After seeing a little hummingbird deceased on our porch, I researched hummingbird feeder placement more in depth.  Apparently, placing the feeders closer to windows is better.  Feeders placed 6' or farther from a window allow the hummingbirds to increase their speed enough to cause death upon collision with a window.  Please keep distance in mind as you place your feeder.  Inexpensive window decals may also alert the birds to the presence of window.

Wednesday, August 6, 2014

Redneck Prize Pull

This weekend, we were blessed to have a reunion of several of our friends from Dallas.  While most of us have moved away, it was like no time had passed at all... well, other than the nine children, ages five to 18 months running around.  They did indicate an air of change in our lives since our mostly childless days in Dallas.

Knowing that our competitive group would have plenty of opportunity to go head-to-head over the weekend - pirogue (think Louisiana-style kayak) races, games of pool, board games, fishing, etc. - it seemed prizes were in order.  I originally thought I would create some trophies out of duct tape and toilet paper tubes, but then a better idea hit, one that took less of my time - The Redneck Prize Pull.  Why, yes, I did think of that name as I was about to fall asleep one night.  How could you tell?

The general idea of The Redneck Prize Pull is wrapping several kitschy items purchased from the local thrift store and placing the items in a box to be pulled every time someone "won" a competition.  For $1.10 at our local thrift store, I purchased the following items:

  • A Yellowstone Coffee Mug
  • A Louisiana Downs (racetrack) Bobble Head Race Horse
  • A Minnesota Coffee Mug made in West Germany (that had to be old, right?!)
  • An M&M Candy Jar Commemorating the 1984 Los Angeles Olympics
  • An Aluminum John Deere Hat (holder??)
  • An Aqua Acrylic Chalice (Which our youngest dropped and I duct taped back together)
  • A Souvenir Cheese Crockery
  • A Lime Green Koozie with the Logo "When Pigs Fly" (and a flying pig, of course)

That's right, I spent a big $1.10 on all that fabulous-ness.  I brought the treasures back home; wrapped them in a conglomeration of boxes, fast food bags, and Wal-Mart sacks; secured the wrapping with our second best roll of duct tape (I truly spared no expense.); and placed the prizes in a large cardboard box.


Prizes were given out for:

  • Male Pirogue Race Winner
  • Female Pirogue Race Winner
  • Best Marksperson
  • Weekend Photographer
  • Baby Whisperer
  • Natural Born Killer (the guy looking to kill some poisonous snakes)
  • Best Second Placer
  • Winner at Headbandz

This was an incredibly cheap way to add some fun to our weekend, and some people even plan to use their prizes (!).  The best part about a "Redneck Prize Pull" is that the items don't really have to be of value. In fact, if something is broken and you have to duct tape it, it just goes with the charm.

Is this something you could do at a future event?  Is this similar to something you have done in the past?  Share your experiences in the comments.

Monday, July 21, 2014

Ticked Off (Tick Bite Prevention)

In our efforts to go more natural and avoid many chemicals in our lives, we have been checking out natural remedies for common issues.  When we got our puppies, I turned to Google for natural flea and tick prevention.  The best solution I found for tick prevention was Rose Geranium Oil.  Our dog, Maggie, was plagued by two to three ticks per day before we began applying oil on her daily at her collar and the base of her tail.   It worked well (no ticks found on her attached or otherwise), BUT I had to remember to apply it every day, and the smell could be a bit strong.

Since finding that solution, a new, oral tick preventative for dogs came on the market - NexGuard.  We switched to it. NexGuard also works well, but it does cost more and I do still find UNattached ticks on Maggie - Maggie seems to attract ticks more than Max.  The main reasons we switched to the prescription tick preventative is because it is oral instead of topical (the kids can pet the dogs without coming into contact with pesticides), and we don't have to remember to apply it everyday.

While NexGuard is great for our dogs (and us), we continue to use the Rose Geranium Oil for ourselves.  Before we take long family walks, I mist our boots and pants with oil diluted with water (shaking well before each application).  It smells good, we don't have to worry about ticks, and we avoid concerning chemicals on our young children.

If you are looking for an inexpensive and natural tick preventative, check out Rose Geranium Oil.

This is the kind we bought from Amazon.com:


Please note: I am not a veterinarian or trained medical professional.  All information presented on this blog represents our family's experiences only and cannot be guaranteed to work for others.  Even natural products can cause negative reactions in people in animals. Use all new products with caution, consulting with your doctor or veterinarian as needed.  I have heard essential oils can cause negative reactions in cats.

Cut It Out (Trail Maintenance)

This weekend we were graced with a Polar Vortex.... Let that sink in - 
A.Polar.Vortex..IN.July.In.LOUISIANA.  
Can I tell you? It felt good. Really, really, really good.

So what to do with all of that beautiful, cool weather? Tackle outdoor projects of course.

The best project was clearing up the main trail from our house to the Old Pond.  It is the trail that we travel the most and the one that you can travel with a car/truck.  Recently, the trail has been becoming a little tight in spots with all of that lush, summer growth and some storms knocking a few small trees and dead limbs askew.

With our project in mind, we loaded the kids up in the hubby's truck, rolled down the windows, turned on the tunes, and loaded the truck bed with tools for trimming. I hopped in the back of the truck, and we began our adventure.  Hubby drove forward slowly, stopping as needed for me to trim larger branches with the pole chainsaw.  Occasionally, he'd stop and we'd tackle a particularly big situation together.  But, my favorite was when he was driving very, very, very slowly (and super carefully (my mom reads this blog)) and I would clip small branches with the hedge trimmers.  The cool breeze in my face, good music, and getting things done with the family - what more could you ask for?

Now we have a more drive-able trail and a good family memory.

If you have any trimming to do and don't want to be tethered to a cord or deal with gas, check out the Ryobi Cordless Pole Saw.  It works on a lithium battery, and it is part of Ryobi's One+ series, which features interchangeable batteries for a variety of products - reciprocal saws, flashlights, weed trimmers, etc.  If we would have had this pole saw in Dallas, it would have saved us hundreds of dollars in annual tree trimming costs. On the farm, it is perfect to take on trail trimming adventures - no cord, no gas, and we have a stash of batteries from our various Ryobi One+ products.  It is lightweight and easy to manage, even for a petite mom of three who had no previous chainsaw experience.  At the price of $150, it really pays for itself if you have some trimming to do in your suburban yard or larger property.  See the link to the pole saw below.

http://www.homedepot.com/p/Ryobi-ONE-9-5-ft-18-Volt-Lithium-ion-Cordless-Pole-Saw-P4361/203444119

This is the combo starter kit hubby received for Christmas one year:

Tuesday, June 24, 2014

Feeling Cheesy (Cottage Cheese Pancake Recipe)

Pancakes - what's not to love?

Tasty? Check
Easy? Check
Customizable? Check
Good for batch cooking? Check
Kids love them? Check
Easy to hide healthy ingredients? Check
Portable for an "on the go" option? Check

Okay. Okay.  Clearly, I have a thing with pancakes.

A few years ago, I saw a recipe in my facebook newsfeed that I thought was worth a try - Cottage Cheese Pancakes.  Using only a 1/2 cup of flour in the recipe, it is low-carb friendly.  It is also a great high protein recipe if you have a bunch of eggs on hand.  With 12 laying hens, that fits us.


Cottage Cheese/Protein Pancakes)
Recipe Notes:   I always double the recipe for our large family.  I use my mini-chopper to blend my cottage cheese.  I have found that fat content in the cottage cheese does not affect the final product. I usually increase my cottage cheese to use a full two cup container. If you don't have quite enough cottage cheese, in my experience, you can sub in sour cream, although you may need to increase the flour content to adjust consistency.  I do NOT add the salt since the cottage cheese I purchase (Daisy brand) contains salt. Rice flour or a gluten free flour blend can be subbed in for regular flour.  I have NOT tried whole wheat flour for fear the pancakes would be "heavy." Any leftovers are usually eaten within 24 hours - we like these a lot. See my adjusted recipe below.

Ingredients Our Way:
12 Eggs, beaten
4 cups cottage cheese, smoothed in mini chopper or blender
1 cup flour, more if needed
1/2 teaspoon baking soda

Our new 3.5 cup chopper
Cook like normal pancakes - greased griddle, hot enough that a drop of water will sizzle on it, drop pancakes to desired size (I keep ours small and use a 1/4 cup scoop to pour.), cook until golden brown on bottom, flip with non-stick spatula when bubbles begin to appear on top and pop (Wash spatula if raw batter gets on it during flips.), cook until golden brown on other side, serve.  Be careful to let pancakes cool appropriately so mouths aren't burned, especially eager, little mouths.

Farm fresh eggs
Serving Suggestions:  You CAN eat these plain or with the traditional syrup or honey or with flavored cream cheese - that's how my kids and husband like them - BUT MY favorite way is to layer the pancakes with plain cream cheese; fresh, sliced strawberries (or blueberrries); and a light sprinkling of powdered sugar.  You can also go with plain cream cheese and bacon if cholesterol is not a concern.  These pancakes DO NOT have quite the same texture as regular pancakes.  The texture is a bit more crepe-y in my opinion.  Our kiddos have not noticed the difference yet or just don' t seem to care.

Notes: I am not a professional chef nor do I play one on T.V.  I'm just a mom with a lot of eggs and a lot of hungry kids.  Also, if your midwife tells you to eat two eggs a day during your pregnancy, this is an easy way to increase your egg/protein consumption.

Is it just me or does this one look like Pac-Man?
Have you tried this recipe before?  How did you serve it?  Did you adjust the recipe with great results?  Tell us about it.  Be sure to see all the notes in the comments section at The Fountain Avenue Kitchen (which I am in no way affiliated).
We really enjoy this griddle we received for a house warming gift.

Putting Down Roots (My Attempts at Propagating Herbs)

We have some beautiful, rocky hills that are not conducive to grass but seem like the perfect spot for herb gardens.  This spring, my high hopes led me to order 2,000 herb seeds and buy about $50 worth of herb plants.

So far, the seeds were 0% success, and the plants are about 50% successful.  I'm a beginner and my results go to prove that.  Read more to see how I am trying to boost my success rate.

Seeds- I tried to germinate the seeds at home and had wonderful initial results with the herbs sprouting quickly.  As this was my first time to try this, I did not realize that the seedlings need much more direct sunlight time and a lot less water.  It took me a few weeks before I could admit the moldy soil with stringy seedlings was a failure (AKA "a learning experience for next time").

Plants- The herb plants are fairing decently given the poor, compacted soil around our house that is result of our house pad being built and given two, large puppies who like to wrestle right where I planted the herbs.

So, here we are, a few months into this grand experiment, with a few, thinly planted herbs - not exactly the lush herb gardens I envisioned or the thriving rosemary hedge lining the driveway.  And, I don't want to lay down any more money on my efforts this year.  What's a girl to do?  Give up? Nope. Time to propagate.

---Wait!---  I'm not here to change your political views.  I'm just trying to multiply my herbs using the surviving herbs I have.  "A vote for more herbs is a vote for a stronger ecosystem and a weaker grocery bill"  Maybe there are bumper stickers in my future...

Back to the topic at hand.  How to propagate.  Research on the internet showed propagation is as simple as a jar of water (preferably filtered) and a cutting of the herb you want to grow.  Suggestions include:

1.) Watering the plant 30 minutes before taking the cutting so the cutting will be fully hydrated.  This suggestion does not seem crucial to success based on my findings.  See my notes on the trampled rosemary.

2.) Cut the stem right below a set of leaves. Make the cutting about 6" in length.

3.) Remove all lower foliage from the cutting so the cutting can focus on sprouting those highly desired roots.

4.) Keep foliage out of the water.  It reduces the instance of disease.  Always a good idea, even if you are just arranging cut flowers that you want to last for a while.

5.) Make a second cut at the base of your cutting while it is under the water, at an angle.  I'm all for angle cutting, but I'm not sure the underwater cutting really did anything of major significance.

6.) Change the water as needed - whenever it begins to look cloudy/dirty.  Be sure to top off your water as it evaporates if needed.   Fresh water, a good idea.

7.) Scrape the base of your cutting with your fingernail if it is a woody herb like rosemary. This suggestion was a winner.

While I did not see any specific recommendation of placing the cutting in a sunny place, a spot with indirect sunlight (but not so sunny your cutting fries) is probably best.


Armed with these suggestions, I began my efforts with Chocolate Mint, Wrigley's Spearmint, and Lemon Balm.  Predictably, the Chocolate Mint took off.  Mint is a hardy herb that loves to put down roots.


Surprisingly, the Wrigley's Spearmint and Lemon Balm were a bust even after a fresh cut and fresh water.


How do you know it's time to give up on a cutting?  Look at the leaves.  If the leaves are starting to look dry, limp, or spotted, it may be time to try another cutting.

When I was transplanting my new Chocolate Mint into the ground, I found Rosemary that appeared recently broken by exuberant puppy play.  I took the Rosemary inside and placed it in a new jar of water after scraping the bottom of the stem with my fingernails.  We went on a trip for a few days and returned to a bunch of roots.  This surprised me, because I had read that it took two months for someone else, but they had tried it in winter and we are in the middle of summer. At the recommendation of my Master Gardener mother, I placed the rosemary in a pot with potting soil to strengthen the new roots before transferring it to the ground.

In our windowsills, you will now see all sorts of cuttings in various jars. I'm still dreaming of hills lush with herbs.  At minimum, our windowsills look cheery and smell good.

Propagation is an easy way to add to your garden without adding costs.  Have fun.  Experiment.  See what you can grow; you may be pleasantly surprised.

Hungry for more?  Check out this article that shows 25 Foods You Can Re-Grow Yourself from Kitchen Scraps. << I have not tried these myself, but it looks interesting.


What are your experiences/suggestions for propagating plants?
The propagated rosemary now thriving in its pot.
I have since began taking cuttings and propagating from it, saving about $3.50 for each new plant grown instead of purchased.

The transplanted Wrigley's Spearmint is flourishing in its new home. 

Wednesday, June 11, 2014

Turtle Tagging

I love turtles, and I find most people do. These (mostly) sweet and harmless reptiles with their good sense of style and "take it easy" attitude are hard not to love. Here at the homestead, we have our fair share of turtles. Several very large red-eared sliders have been finding their way into our yard to the chagrin of our puppies. Over the past few days, I seem to have a side career of rescuing turtles from curious puppies and returning the reptiles to the pond in front of our house.

This morning, I had the "aha!" idea of marking the turtles with nail polish on their shells to see if we either have a bumper crop of super large turtles or if we have some not-so-bright turtles on our hands. My brilliant husband suggested that we actually paint numbers on the shells.

As I was returning "1" to the pond today, Maggie (our German Shepard bird dog mix puppy) found what soon became number "2." My family couldn't believe that I left with one turtle and returned with another on that quick walk.


We have been using our handy National Audubon Society Field Guide to the Southeastern States to identify our turtles.  A couple of weeks ago, we used our guide to identify an Eastern Box Turtle (three toed race).  If you live in the Southeastern states and enjoy getting out into nature, I highly recommend you pick up your own copy of this guide.


Also, check out this interesting article about the turtle industry in Louisiana.  I didn't even know we had a turtle industry, much less that we dominated the market.

A Bloomin' Good Time (Summer Fun Idea with Kids)

Last year, at the Dallas Museum of Art, I saw a great idea I could easily bring home for the kiddos. By "good idea," know I mean simple, inexpensive, a lot of bang for your buck, and educational. They had taken flower leis, separated the silk flowers from the leis, placed the plethora of silk flowers in a container, and added some buckets and shovels to the area. Voila! An activity center that the kids really enjoyed.

When we returned home, I made my way to Dollar Tree, where I picked up several leis. I returned home, cut the flowers away from the string, and placed the flowers in a sealable container. I also left a few leis whole for my little ones to play dress up. Since this can be understandably messy, we only bring out the activity as our day allows, which also keeps the activity "fresh" and "special" instead of becoming another toy that sits on the shelf or a source of frustration.

 So, here are the steps again:

1. Go to the store and buy leis.  I bought these at Dollar Tree.
2. Cut up the leis.
3. Place the leis in a sealable container.

4. Play.

The kiddos enjoy making flower showers, "planting" flowers, sorting flowers, playing restaurant (making salads and cleaning up), playing garbage collector, dance class, and whatever else there little minds cook up. This activity can be used for teaching sorting, counting, colors, and how flowers/plants grow to name a few.

Note that the silk flowers will leave little threads in their wake, so be prepared to vacuum sometimes.

A Day in the Life...

Today, I am recovering from a cold/flu-like bug that hit me hard two days ago.  You would think that would mean things would be pretty calm around here...yeah right, with three kids five and under, think again.  Things you could have heard at Halls' Homestead today if you were a fly on the wall:

  1. Kids Fighting over Millipedes  No, seriously. Our house is having a mini invasion of millipedes at the moment.  I've been quietly disposing of the little guys, but, our precious three year old found one during her nap time last week (when she should have been sleeping, right?) and declared "He's SO CUTE!!"  The kids played with that first millipede for an hour and a half before he was released into the wild.  Today found the two oldest with empty containers fighting over who gets the newest millipedes.  You know it's going to be an exciting day when there is a screaming and shoving match over household pests.
  2. Lunch Does Not Need 'More Cowbell'  Ahh, the Saturday Night Live sketch with Christopher Walken proclaiming a need for "More Cowbell."  Well, today, our three year old thought lunch was an appropriate time to leave the table, find a cowbell, and clang it loudly, which prompted me to say "Lunch does not need more cowbell.  Please put the cowbell away and return to the table."
  3. Me Asking Our Five Year Old If He Peed on the Dog's Face  Wait! Before you call PETA, know that no dog was hurt in this event.  While on the porch, I heard my son ask my husband if he could go outside.  Next thing I know, Max (a curious black-lab puppy mix) is on our porch with an odd wet pattern on his face wanting me to pet him.  Putting two and two together left me asking our son if he had peed on the dog's face, resulting in a sheepish "It was an accident mom."  Of course, a few moments later, I found myself distractedly petting Max while watching the one year old equaling an "Eww! Gross!" moment. (Note: Upon reading this entry, my hubby clarified the situation - Our son was helping my husband feed the chickens in the chicken pen when he asked if he could pee and show his dad how he could "shoot" through the chain link enclosure.  Poor Max just wandered into the line of fire.  All of this makes me wonder how our son's aim is so good to go through chain link but not so much when it comes to the potty??  Boys.)
There were also the normal "don't eat the play-doh" and "put on your underwear" kind of moments too.  These will be the days we miss.  I hear it again and again.  I know in my heart is true, and most days, I am a pretty good sport about the craziness. My motto that helps? "Outwit. Outplay. Outlast."  Thanks, Survivor!  It's a great motto for a household full of preschoolers.


More Cowbell
https://www.youtube.com/watch?v=lGBD1KUz2RA

Monday, May 26, 2014

Wild Times (Wildlife on Halls' Homestead)

We are blessed with lots of animals from the wild kingdom at Halls' Homestead.  An otter lives in our pond, a great blue heron likes to aggravate our dogs, various ducks stop in throughout the year, and then there's the normal gambit of coyotes, foxes, raccoon, moles, gophers, armadillo, squirrels, frogs, toads, turtles, snakes, rabbits, wild hogs, deer, fish, lizards, salamanders, turkeys, and opossum.  Not long after moving here, I found myself wanting to know more and wanting to be able to teach the kids more about the things we found on our nature walks.  I searched Amazon.com for a field guide and came across this one:

It's a handy little guide the kids and I use to identify the things we find on the farm.  One night, I found a dead moth in the house.  We immediately pulled out the guide and began looking for the exact species of moth we had found.  As we find and identify species, we place a check in our book next to the entry.  My goal is that the kids and I both learn more about our surroundings and that the kids learn to look for books for answers in addition to the internet.  I also want to increase their ability to notice details, and looking at the slight variations between species seems to be great practice.

There is also more excitement and general interest when we find things in the yard than there would be without the field guide.

This particular guide is "a mile wide and an inch deep" as one reviewer stated, since the book does cover the entire Southeast including coastal regions and sea life.  There are more extensive field guides available, but the kids and I are suckers for glossy, full-color photos.  It is a good fit for us as beginners.

Great Blue Heron


08/12/2014 Update: The other day I called my mother to excitedly tell her that I had discovered Butterfly Pea on our property using the field guide.  She must have thought I had been in the sun too long or really fancied myself as an expert with my field guide, because she thought I believed that I had found and identified butterfly urine.  After a brief "Who's on First?" style conversation, she finally realized that I had found a flower that is featured on the cover of our field guide.

09/02/2015 Update: Check out this Great Horned Owl that landed in our front yard this evening.

Great Horned Owl


Friday, May 23, 2014

Pip Squeaks (Squeaker Shoes for Littles)

Squeaky shoes for early walkers

When our son was first walking, one of his friends had squeaker shoes - they were adorable.  You knew exactly where the little boy was at all times.  Our son mainly went barefoot, but I filed that idea under "with our next child..."  Less than three years later, we ordered our first pair of squeaker shoes for our little girl for her first birthday.

What we really like about squeaker shoes:
  1. They encourage those first steps from early walkers who still haven't decided if they like crawling or walking better.  The sound of the squeaking is an immediate reward.
  2. You can keep up with your child more easily.  If you're not a parent of an early walker yet, don't judge.  Those little guys can move quickly.
  3. By the same token, you have an idea when something is up.  One time the squeakers suddenly went silent.  I turned to find our little girl eyeing a worm in her hand hungrily.  Yep, were we glad we had squeakers at that moment.
  4. And, finally, it's just so stinking cute!  
Warning - Squeakers aren't cute for everyone.  Consider where your child will be squeaking.  Our library is okay with it, but some libraries may not be. At church Sunday morning, let the volunteers/staff know that it is okay for your child to go barefoot for their sanity.  And, squeakers at a dog park - let's just say it's not a good idea.  Most squeaker shoes have removable squeakers so you can choose to squeak up or not.

Usually we are asked the same question over and over and over "Where did you get those?!! I would love to get some for my niece/nephew/granddaughter/child/cat/etc."  (Okay, kidding on the cat, but I had to make sure you were paying attention.)  We bought the most recent pair of squeakers for our second daughter on Amazon.com.  hide and squeak mary janeis the search I recommend for girls' shoes; use hide & squeak toddler boys to find squeaker shoes for boys .  Zulily often has squeakers too.  

While the average price of squeakers can be high (around $40), we think it is worth it for that special, one-time occasion such as a first birthday or baby shower.

Thinking about purchasing some squeakers but aren't sure of foot size?  Check out this chart (PDF file) from Zulily.com: http://www.zulily.com/images/size_charts/fit_little_feet_sizechart_US.pdf.

Are you buying this as a baby shower gift?  I would consider a Toddler Size 4.  Our first daughter could rock an Infant 3 at a year; our second daughter measured at a Size 4.  Squeaker shoes do seem to run larger, and larger is always better as they WILL grow into that size.  Also, take into consideration your area's climate and whether socks/hosiery may be worn.


Thursday, May 22, 2014

I've Never Felt This Way Before (Making a Felt Board)

Somewhere in the back of my mind lies all of these cute ideas, ideas to dress up our home, amp up the fun, and to help our children learn.  Buried in that heap has been the idea of a felt board.  Felt boards have long been loved by teachers, librarians, and children alike for their hands on (and plain ol' fun) learning value.  What is a felt board?  It is a board that felt sticks to, specifically characters, letters, numbers, etc. cut out of felt.

A couple of weeks ago, the idea finally came to fruition in our house.  It began with two packages of pre-cut felt on deep discount in the after Easter sale aisle of the local Wal-Mart.  Other than the label showing Easter craft ideas, there was nothing inherently "Easter-y" about this plain felt.  I plopped my $5 down for the big stack and felt a spark light under the long-buried, felt board idea.

The next step was Google.  I found that felt sticks to flannel and that flannel is an ideal base for a felt board.  The fabric is inexpensive and easy to use - bonus!

Some people use cardboard for their felt board backs; others use wood.  I went with the suggestion I found for a canvas.  I had two, unpainted canvases in the attic that were the perfect size.

Next, I called my mother-in-law to see if she had any flannel on hand.  She is an avid quilter who really likes to back her quilts in flannel.  Turns out, she had the perfect shade of dappled blue on hand that resembled a sky, and she was already heading my way.

Once I had the flannel on hand, I wrapped it around my canvas edges and cut the fabric with out measuring.  Then I pulled the flannel tight around the canvas and secured it to the wooden frame on the back of the canvas using a staple gun.

Then the felt board was done!!

On to the fun part - Bringing out the scissors and the Sharpie markers I went to work cutting out shapes and coloring items for the board.  Be careful to let your Sharpie marker dry well and not to smear it before it's fully dry.

How excited was our middle child to see her very own unicorn flying across her new felt board!!

Now, I plan to use the remaining materials to make my son his own felt board, with a brown horse as requested.

Wednesday, May 21, 2014

Deer Me!! (Deer Bacon Burger Tacos)

This appears to be our first week of serious summer around Halls' Homestead. What to eat? What to eat?  Tacos!!  Everyone can pick exactly what he or she wants to eat, and we can make sure plenty of fresh veggies are piled available.  But these aren't your normal tacos...

These are deer bacon burger tacos.  My dad is a big hunter, and we are blessed with deer meat.  Deer is an exceptionally lean meat, so Dad likes to have his deer processed with a bit of bacon in order to make hamburger patties.  While the deer bacon burgers are tasty, we were ready for something different.  Below are the steps we take for delicious tacos.

Thaw the meat, and brown the deer bacon blend in a skillet with a bit of oil.  Add 8 ounces of taco sauce per pound of cooked meat, and sprinkle with onion powder, garlic powder, dried oregano, cumin, and paprika.  Simmer until sauce desired thickness and serve.  We like to pile on spinach/spring mix lettuce, tomatoes, onions, avocado, cheese, and sour cream.  Serve with chips, salsa, re-fried or black beans, and fresh fruit.


The Pits (Cherry Pits, That Is)

Last week, when reading a magazine, it came to my attention that there is a tool for pitting cherries - what?!!!  You mean all these years of carefully cutting out cherry pits with a butter knife in order for the kids to eat cherries was for naught?! I immediately went to Amazon looking for this handheld wonder.  Not only did I find the traditional handheld model but an even better mechanical model AND for only $5.99!! I don't know if I've ever hit "Click to Purchase" so quickly before.
 Today, we broke the pitter out of the box.  After my quick assembly, I let the older kiddos loose on it (with careful supervision, of course).  It was easy and fun to use.  My son was soon looking (aka begging) for something else, anything else to pit.

At the time of this post, only 10 are left in stock on Amazon, but check it out.  It was definitely worth it for us: Norpro 5120 Deluxe Cherry Pitter.  UPDATE:  This product has increased in price since just last week.  If you have your own cherry tree or for any reason pit a lot of cherries, consider this product.  If you are just going to pit some cherries every so often, the price increase may not be worth it for you.

Tuesday, May 13, 2014

One of Those Days

We all have them - one of those days.  Well, that was today for us.

A storm last night knocked out our internet and cell phone service, which meant the hubs could not work from home and we could not call anywhere in an emergency.  While I was in the shower, it was decided we should immediately load up the family and head to my parents' house in town for the day.  Too bad we couldn't call to tell them.  No worries though, they welcomed our brood with loving arms.

During the course of our day, our youngest rumbled with a brick hearth requiring a quick and unexpected trip to the only doctor we could find open with Dermabond on hand.  One glued forehead later, we were back in business.

Tee-ball was cancelled due to the storm, which was no biggie as it was a super late game.

When we arrived back home to returned cell/internet service - yay!-, we found that our annual order of homeschool books had arrived, been left on the door step, and been digested by our dogs - !!!!!!  After picking up the scattered pieces of our expensive order, we called the shipping company who said "call the shipper," who was, of course, closed for the day. A careful review of the damaged items found that only three items were seriously damaged at a cost of less than $18 - whew!!

The ironic part of all of this: one of the books that was in pieces was aptly titled, It Could Always Be Worse.  LOL and Amen to that!!


Here's to hoping you had a great day today.

Monday, May 12, 2014

Projects

We love projects here at Hall's Homestead.  I hope to post pictures of the quilts we've hung, our indoor swings and climbing rope, stenciled mailbox, roosting bar for the chickens, magnet board, orchard, herb gardens, and other little projects along the way.  Even though we both grew up here, we have a lot to learn, and we hope you join us on our learning journey.  Some projects we hope to tackle are vertical strawberry gardening, canning, making our own bread starter, growing pumpkins, and beekeeping.


The Promised Land

Praise God!  I feel like we have reached "the promised land."  Last Thanksgiving, we were able to move into our home and have our first house guest.  While it has taken a while to even begin to feel settled after a two year period of upheaval, I finally feel life settling, relaxing, becoming comfortable again.

Over the past few months, I have known the joy of using our house as we hoped we could.  We've welcomed guests into our home to experience country life and relaxation; we've hosted a college reunion where friends could hike and play; we've had family gatherings where everyone ate their fill, visited, and went fishing; we've used it for our day to day life of working from home and homeschooling; and we've even been blessed with the ability to have a weekly Bible study here.

During the building process, we realized this is God's house - no, I don't mean like a church but rather, everything we do, everything we have is for Him and should be used for His glory.  We prayed that God would be able to use our home in a mighty way and that other would be able to come to know God better somehow through our home.  It has been a blessing, in just the short time we've been here, to see everything coming together for His good.  We look forward to seeing how He will use this home in the future.

In Dallas, we realized that our home could be used for God's glory, even when we lived a small house not "designed for entertaining."  You can use your home - whether it be a dorm room, apartment, small house, mansion, etc. - for showing God's love to others.  Pray how God can use your home to be a blessing to others.

The Wilderness

This part was very difficult to write about, thus the vast amount of time since my last post.  My last post was during what I consider "the wilderness period."  We all know God called the Israelites out of Egypt.  That was his will.  It wasn't easy, and they repeatedly failed to trust in God, leading to 40 years in the wilderness.

The process of moving our family to another state with two young kids in tow and another on the way was not easy.  God paved the way.  God provided a clear cut path and direction.  However, I let the details stress me immeasurably.  That was definitely one of the toughest times in my life.  We've moved nine times, but this was different.  The details drowned me. My biggest fear - that we'd design a home that would be a burden to us and the generations after us.  This was, after all, a FOREVER home.  It is on family land and cannot be sold.  I often went from joy to despair - and back and forth.  I would berate myself for stressing over small details - first world problems - when I knew there were people in the world with REAL problems - lack of clean water, hunger, abuse, etc. By not trusting in God and letting Him take control, I entered into the wilderness, taking my loved ones with me.  Our journey could have been different if I would have fully trusted Him, held true to His promises, and relinquished control.

Although it was a tough time, it was not without joy.  We welcomed the birth of our second daughter.  We were blessed with an increased closeness to our families.  And, I learned.  I learned God's got this - not just the big stuff, but the details too.  I learned God and my family love me even when I am beyond difficult.  Even when we face difficult times, God is there.  God can use those times in our lives to bring us closer to Him, by trusting in Him more and learning more about His character.  We can also use those times to better understand those about us and to treat others with more love.

If you are facing a tough season right now, know that God is there.  He is not leaving you.